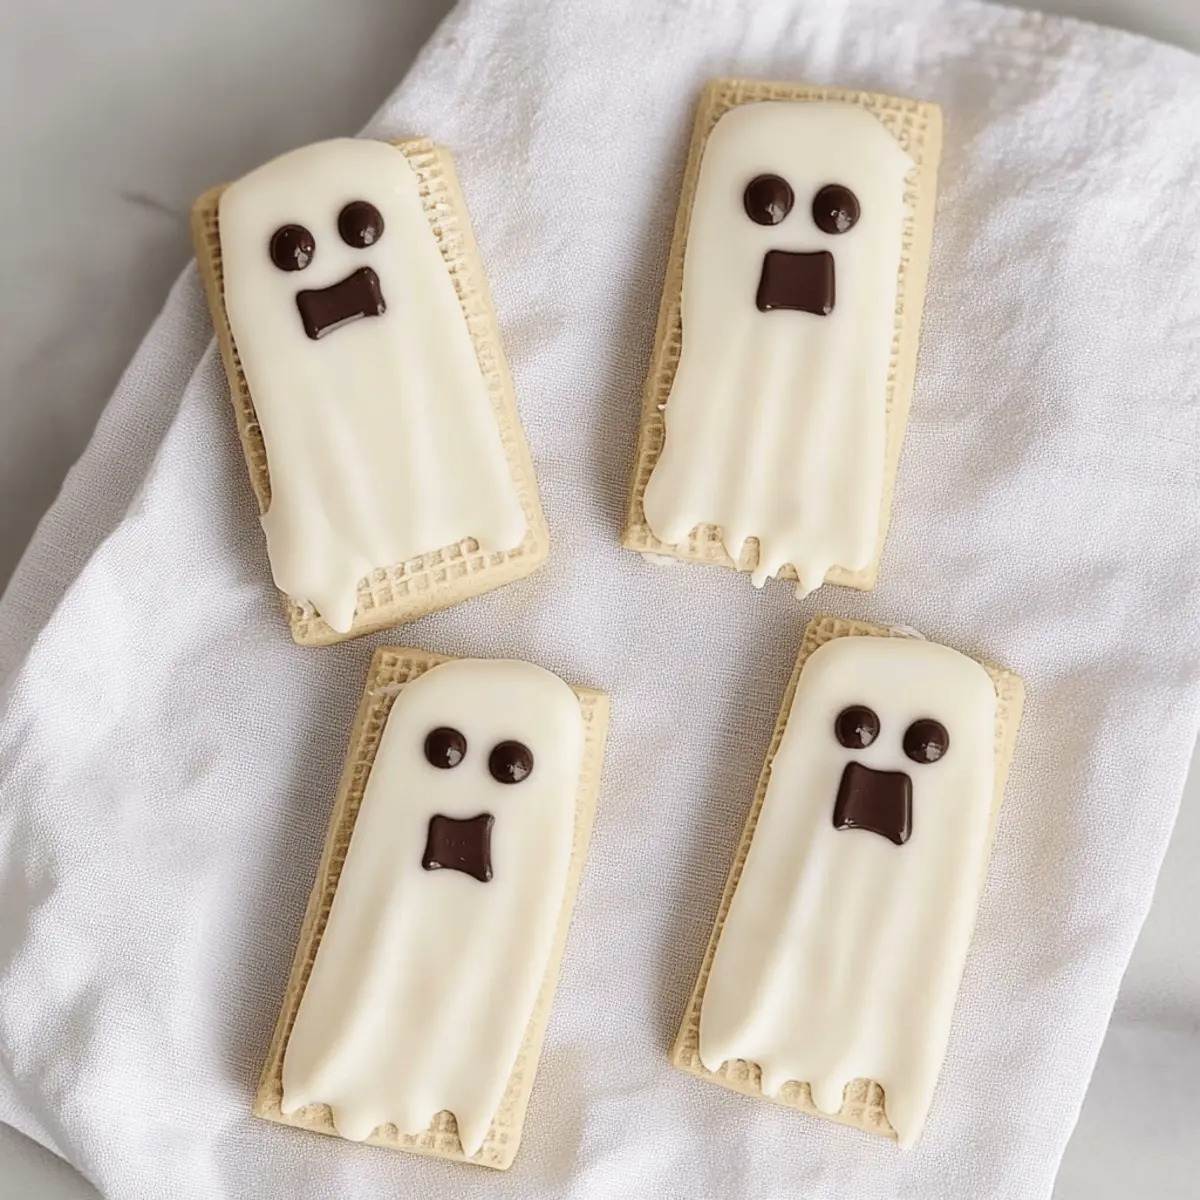
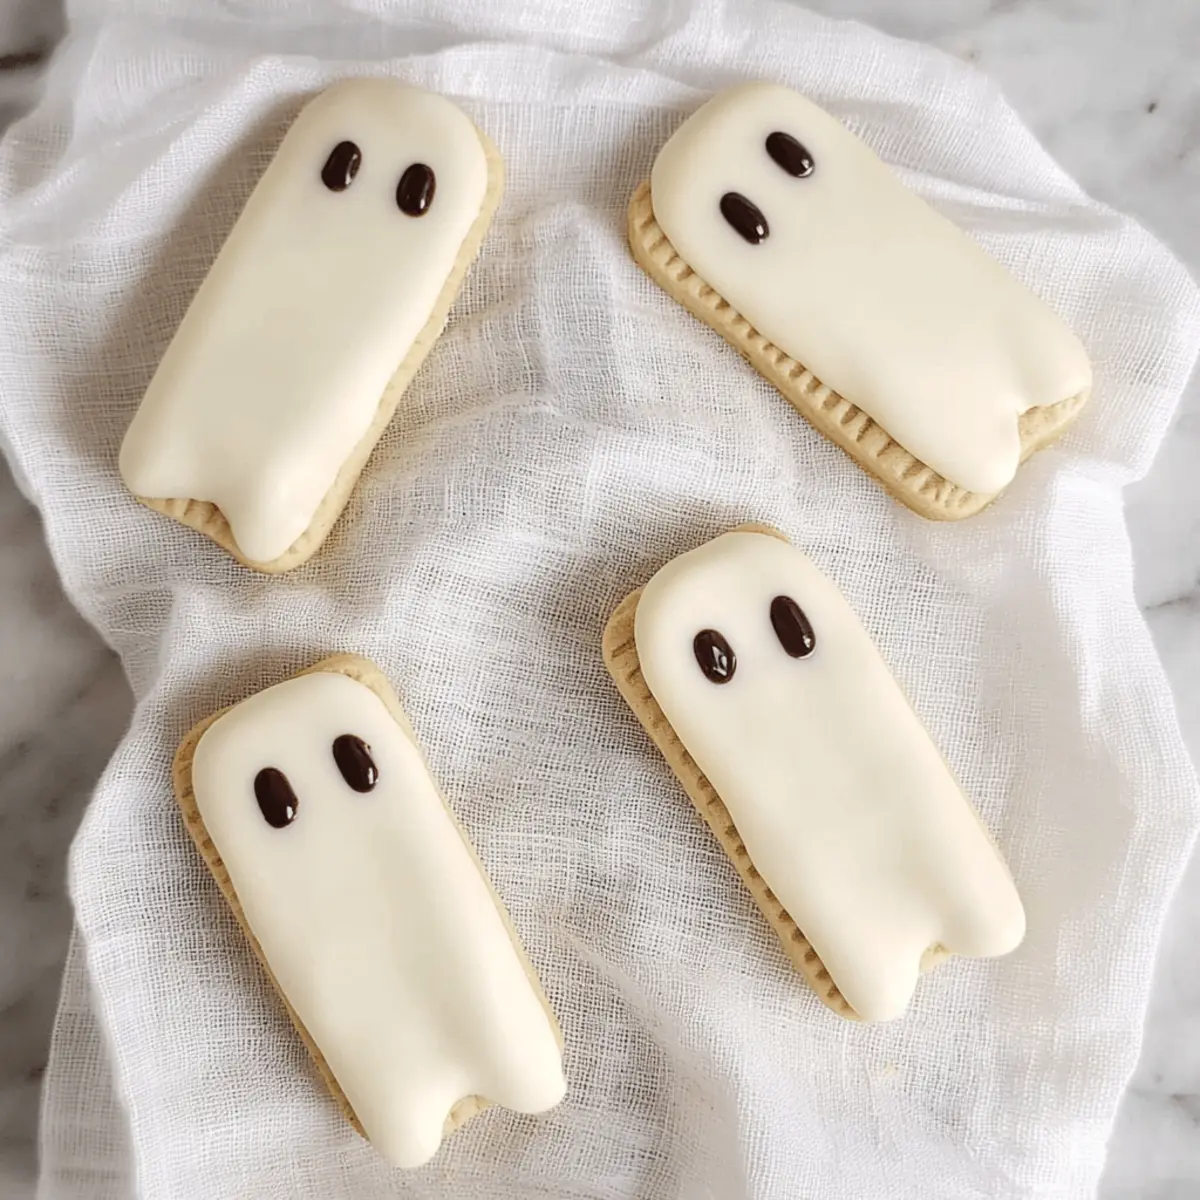
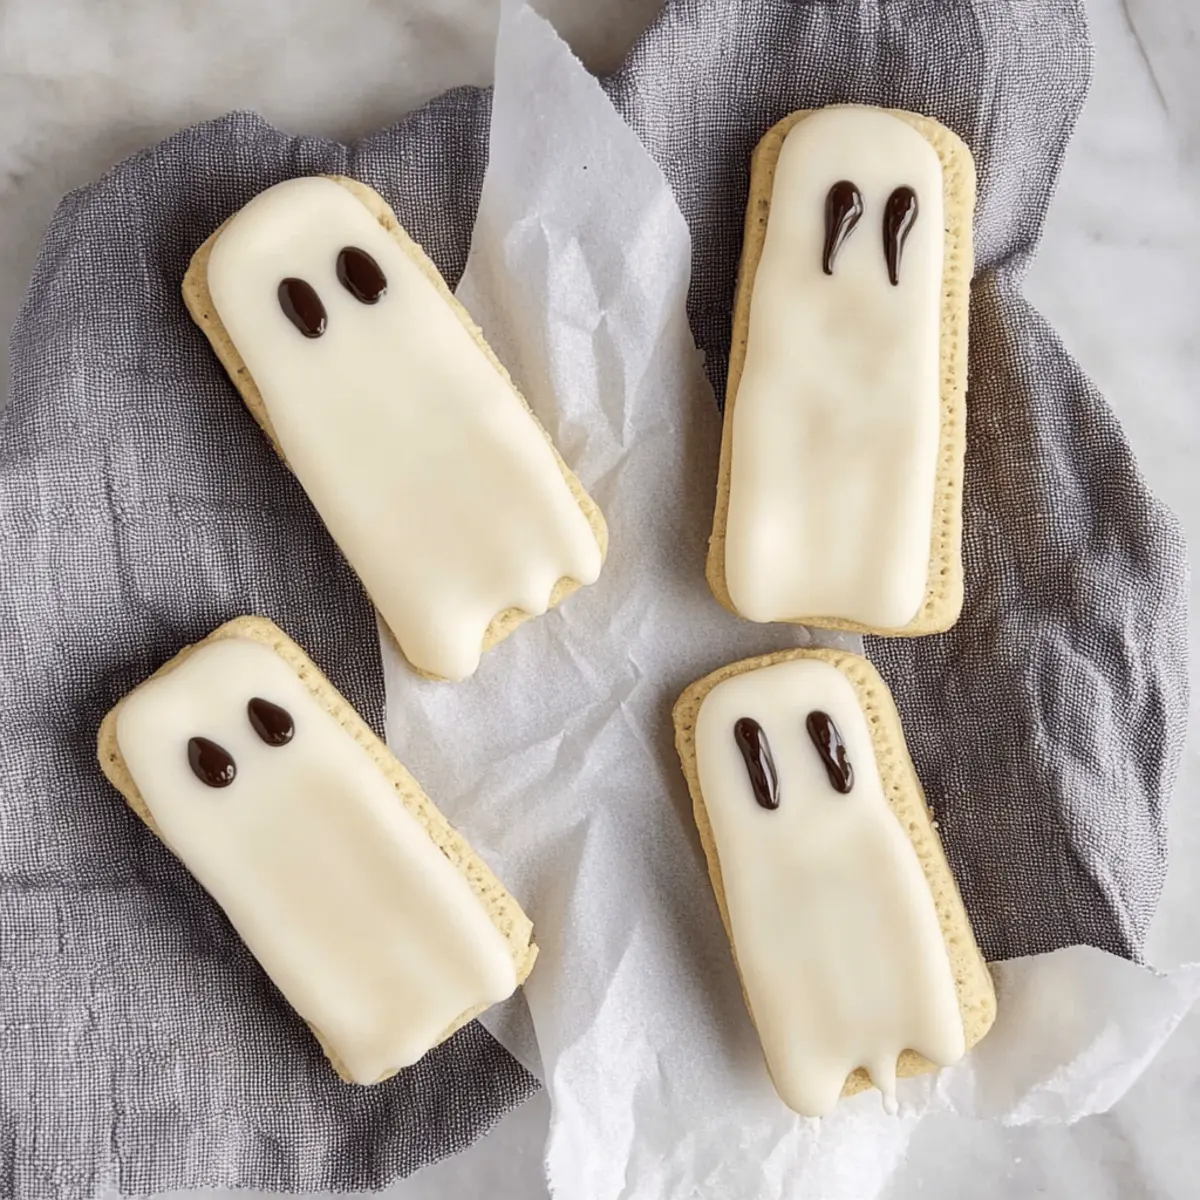
As I rummaged through my pantry, I stumbled upon an unopened box of wafer cookies, and I instantly felt a spark of creativity. This could only mean one thing: it was time to whip up some Chocolate Dipped Ghost Wafer Cookies! Not only are these spooky delights an easy Halloween snack, but they’re also a fun way to bond with kids as we transform simple ingredients into adorable little ghouls. With just a few moments of prep and the satisfaction of seeing them come to life, this recipe promises both a quick fix for sweet cravings and a festive touch to your Halloween celebrations. Ready to embrace the spirit of the season and delight your family with these ghostly treats? Let’s get started!

Why Make Chocolate Dipped Ghost Cookies?
Simplicity at Its Best: These cookies require minimal ingredients and no baking, making them a quick choice for busy days.
Holiday Fun: Bring excitement to Halloween with a creative activity that kids will love to join in on.
Adorable Presentation: With their ghostly faces, these cookies are as cute as they are delicious, perfect for parties or classroom treats.
Customizable: Feel free to get creative by adding sprinkles or using different chocolate types; the options are endless!
Crowd-Pleasing: These chocolate-dipped delights are sure to impress your friends and family, satisfying both kids and adults alike.
Elevate your Halloween snacking by pairing them with other festive treats like Cinnamon Roll Cookies or German Chocolate Poke.
Chocolate Dipped Ghost Wafer Cookies Ingredients
For the Cookies
• Wafer Cookies – These provide the crunchy base for your ghostly treats; use store-bought ones to save time!
For the Chocolate Coating
• White Chocolate Chips – Essential for creating that hauntingly adorable ghostly look; substitute with white chocolate candy melts for easier melting.
• Semi-Sweet Chocolate Chips – Perfect for adding the facial features of your ghosts; you can swap it with dark chocolate if you prefer a richer flavor.
• Vegetable Oil – A small amount helps achieve a smooth melting consistency for the chocolate; remember, it’s not needed in large quantities!
Dive into creating these Chocolate Dipped Ghost Wafer Cookies and make your Halloween extra special!
Step‑by‑Step Instructions for Chocolate Dipped Ghost Wafer Cookies
Step 1: Melt White Chocolate
In a microwavable bowl, combine white chocolate chips with a teaspoon of vegetable oil. Microwave in 30-second intervals, stirring in between until the mixture is smooth and fluid, taking about 1 to 2 minutes in total. The chocolate should be glossy and free of lumps, ready for dipping those delicious Chocolate Dipped Ghost Wafer Cookies.
Step 2: Dip Wafer Cookies
Using a spoon, carefully dip an entire wafer cookie into the melted white chocolate, allowing any excess to drip off. Place the coated cookie onto a piece of wax paper, ensuring it’s flat. Repeat this process for each wafer cookie, creating a smooth layer that resembles a ghostly figure. Let them sit for about 10-15 minutes for the white chocolate to cool and set.
Step 3: Melt Semi-Sweet Chocolate
Now, repeat the melting process with semi-sweet chocolate chips in a new microwavable bowl. Add minimal vegetable oil—just enough to enhance the melting consistency. Heat in 30-second intervals, stirring until smooth and glossy. This semi-sweet chocolate will bring your Chocolate Dipped Ghost Wafer Cookies to life with adorable facial features.
Step 4: Decorate the Ghosts
Once the white chocolate coating has fully set, grab a toothpick to create the ghostly faces. Dip the toothpick into the melted semi-sweet chocolate and carefully dot on two eyes and a mouth on each ghost. This adds a personal touch, transforming your already cute cookies into fun and spooky treats that are perfect for Halloween.
Step 5: Cool and Serve
Allow the decorated cookies to cool completely on the wax paper, ensuring the semi-sweet chocolate hardens tightly to the ghostly figures. This typically takes 10–15 minutes. Once set, gently transfer your Chocolate Dipped Ghost Wafer Cookies to a serving plate, ready to delight everyone with their festive charm.

Chocolate Dipped Ghost Wafer Cookies Variations
Feel free to get creative with your cookies and discover delightful twists that elevate your Halloween treats!
-
Sprinkle Surprise: Add colorful sprinkles or edible glitter on top of the melted chocolate for a festive pop. Kids will love the extra sparkle!
-
Flavorful Wafer Options: Swap out traditional vanilla wafers for chocolate or strawberry-flavored wafers to add a fun twist to the flavor profile. The kids will enjoy the surprise!
-
Dark Chocolate Delight: Use dark chocolate instead of semi-sweet for a more intense flavor contrast. It adds a rich depth that chocolate lovers cherish.
-
Nutty Crunch: Crush some almonds or walnuts and sprinkle them over the melted chocolate before it sets, adding a delightful texture and nutty flavor.
-
Peppermint Twist: Mix in a few drops of peppermint extract into the white chocolate for a refreshing, minty surprise that’s perfect for Halloween!
-
Ghostly Shapes: Use cookie cutters to create fun ghost shapes out of the wafers, or try different Halloween motifs like bats and pumpkins for added excitement!
-
Add a Zing: Try drizzling a bit of lime or orange juice reduction over the chocolate for a fruity brightness that balances the sweetness beautifully.
Combining these variations with other crowd favorites like Dark Chocolate Blackberry Cupcakes and Melt Mouth Chocolate can elevate your Halloween festivities even further!
Expert Tips for Chocolate Dipped Ghost Wafer Cookies
• Perfect Melting: Make sure to melt your chocolate in short intervals to prevent overheating. Always stir well after each interval for smooth consistency.
• Avoiding Drips: After dipping each wafer, gently shake off excess chocolate to avoid clumping. This will ensure a clean ghostly appearance!
• Decorating Fun: Use different tools, like a piping bag or toothpicks, for various facial expressions on your ghosts. Personalize each cookie for extra fun!
• Storing Wisely: Keep the finished Chocolate Dipped Ghost Wafer Cookies in an airtight container at room temperature to maintain their freshness and crunch.
• Quick Substitutions: If you don’t have vegetable oil, coconut oil works well to keep your chocolate glossy and smooth without altering the taste.
Make Ahead Options
These Chocolate Dipped Ghost Wafer Cookies are fantastic for meal prep, allowing you to enjoy the Halloween spirit with minimal last-minute stress! You can easily dip the wafer cookies in white chocolate up to 24 hours in advance; simply store them in an airtight container at room temperature to maintain their crispiness. The ghostly decoration can be done closer to serving time, but if needed, you can decorate them up to 3 days ahead—just ensure the cookies are fully cooled and stored separately to avoid melting or sticking together. When you’re ready to impress your family or guests, allow the decorated cookies to sit for a few minutes for the chocolate to soften slightly before serving, while remaining just as delightful!
What to Serve with Easy Chocolate Dipped Ghost Wafer Cookies
These delightful treats are sure to brighten your Halloween gatherings, but why stop there? Elevate your celebration with these delicious pairings.
- Pumpkin Spice Hot Chocolate: A steaming cup of rich hot chocolate, infused with warm pumpkin spices, adds a cozy touch to your spooky festivities.
- Crispy Caramel Apples: The crunchy sweetness of caramel apples contrasts beautifully with the chocolatey cookies, providing a classic Halloween flavor combo.
- Ghostly Marshmallow Pops: Light and fluffy marshmallow pops on sticks, dipped in chocolate, contribute to the ghostly theme and are fun for kids to help create.
- Spooky Fruit Skewers: Combine seasonal fruits like grapes and strawberries on a skewer, making a fresh, vibrant counterpart to the sweetness of your cookies.
- Apple Cider: Serve warm apple cider with an infusion of cinnamon for a delicious drink that perfectly complements fall flavors and adds autumn charm.
- Gummy Worms and Dirt Cups: This playful dessert adds a fun element to your spread and provides textural variety against the creamy chocolate coating of the cookies.
- Creepy Cupcakes: Decorating cupcakes with eerie designs can be a hit at your gathering, making for a visually appealing and edible centerpiece.
- Halloween Punch: A fruity punch with floating “eyeballs” (lychee fruit with blueberries) will engage everyone’s senses and make for a festive beverage option.
- Chocolate Fondue: Dip strawberries, bananas, or pretzels into warm chocolate fondue for an interactive dessert experience that will delight guests of all ages.
- Chilled Pumpkin Mousse: Light, airy, and spice-infused, this mousse adds a smooth, creamy finish that balances the crunchy texture of your cookies perfectly.
How to Store and Freeze Chocolate Dipped Ghost Wafer Cookies
Airtight Container: Store your Chocolate Dipped Ghost Wafer Cookies in an airtight container at room temperature for up to one week, ensuring they stay crispy and delicious.
Avoid Moisture: Keep them in a cool, dry place to prevent moisture from ruining that delightful crunch. Avoid exposure to sunlight.
Freezer Storage: If you want to keep them longer, freeze the cookies in a single layer on a baking sheet for 1-2 hours, then transfer to a freezer-safe bag for up to three months.
Reheating Tips: To restore the original texture after freezing, allow them to thaw at room temperature for a few hours before enjoying!

Chocolate Dipped Ghost Wafer Cookies Recipe FAQs
How do I choose the best wafer cookies for this recipe?
Selecting wafer cookies involves looking for a brand that’s light and crispy without any visible damage. Check the packaging for freshness and avoid any that have dark spots or are broken. Go for the classic vanilla flavor, as it pairs flawlessly with chocolate, creating a delightful balance.
What is the best way to store Chocolate Dipped Ghost Wafer Cookies?
Store your Chocolate Dipped Ghost Wafer Cookies in an airtight container at room temperature for up to one week. Remember to keep them in a cool, dry place, away from sunlight and moisture, to maintain that crunchy texture and delicious flavor.
Can I freeze Chocolate Dipped Ghost Wafer Cookies?
Absolutely! To freeze these cookies, place them in a single layer on a baking sheet lined with wax paper for 1-2 hours, allowing them to harden. Once set, transfer them to a freezer-safe bag, ensuring as much air is removed as possible. They can be frozen for up to three months. When you’re ready to enjoy them, let them thaw at room temperature for a few hours.
What should I do if my chocolate is not melting properly?
If your chocolate isn’t melting smoothly, it may be overheating. Always microwave in 30-second intervals and stir well after each session. If you experience lumps, add a tiny splash of vegetable oil to help achieve a smoother consistency. Also, remember, using candy melts can provide a more foolproof melting experience!
Can pets eat Chocolate Dipped Ghost Wafer Cookies?
It’s best to keep these cookies away from pets, especially dogs and cats, as chocolate is toxic to them. If you want to involve your pets in Halloween treats, consider making a pet-friendly version with carob instead of chocolate, which is safe for them.
Are there any allergy considerations I should keep in mind?
Yes, be cautious of allergies related to chocolate and cookies. If you’re serving children or guests with allergies, check the ingredient labels thoroughly. You can use allergen-free chocolate or wafers, ensuring a safe treat for everyone. Always consider using a dedicated workspace to avoid cross-contamination with allergens.

Delightful Chocolate Dipped Ghost Wafer Cookies for Halloween
Ingredients
Equipment
Method
- In a microwavable bowl, combine white chocolate chips with a teaspoon of vegetable oil. Microwave in 30-second intervals, stirring in between until smooth and fluid, about 1-2 minutes.
- Carefully dip each wafer cookie into the melted white chocolate, allowing excess to drip off. Place on wax paper to set for 10-15 minutes.
- Repeat the melting process with semi-sweet chocolate chips in a new bowl, stirring until smooth and glossy.
- Once the white chocolate has set, use a toothpick to dot eyes and a mouth on each ghost with the melted semi-sweet chocolate.
- Allow decorated cookies to cool completely on wax paper for 10-15 minutes before serving.

Leave a Reply