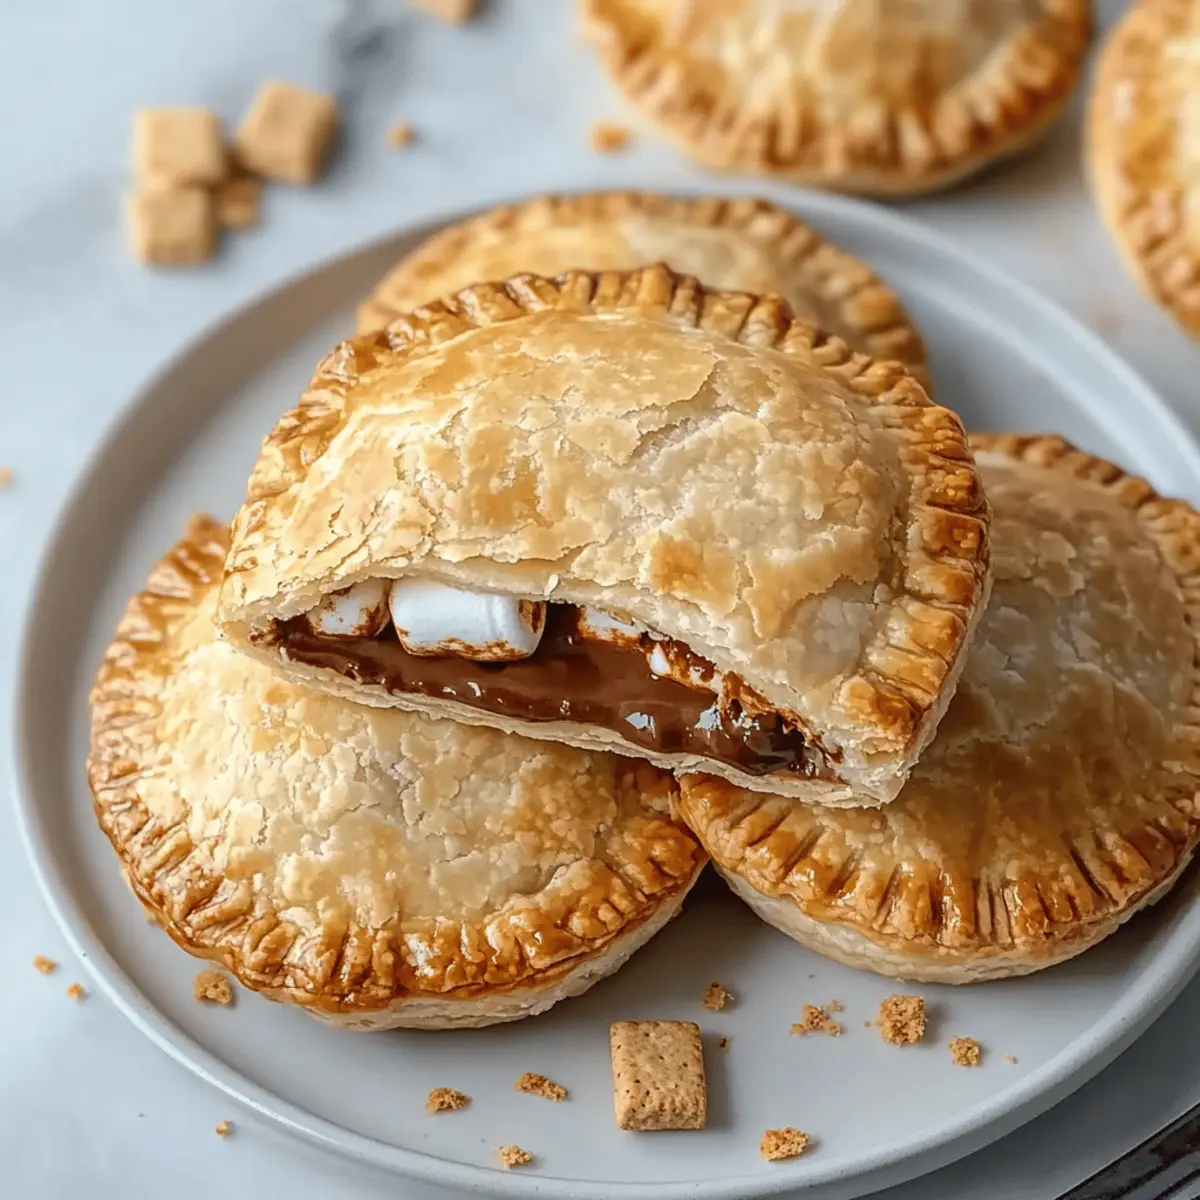
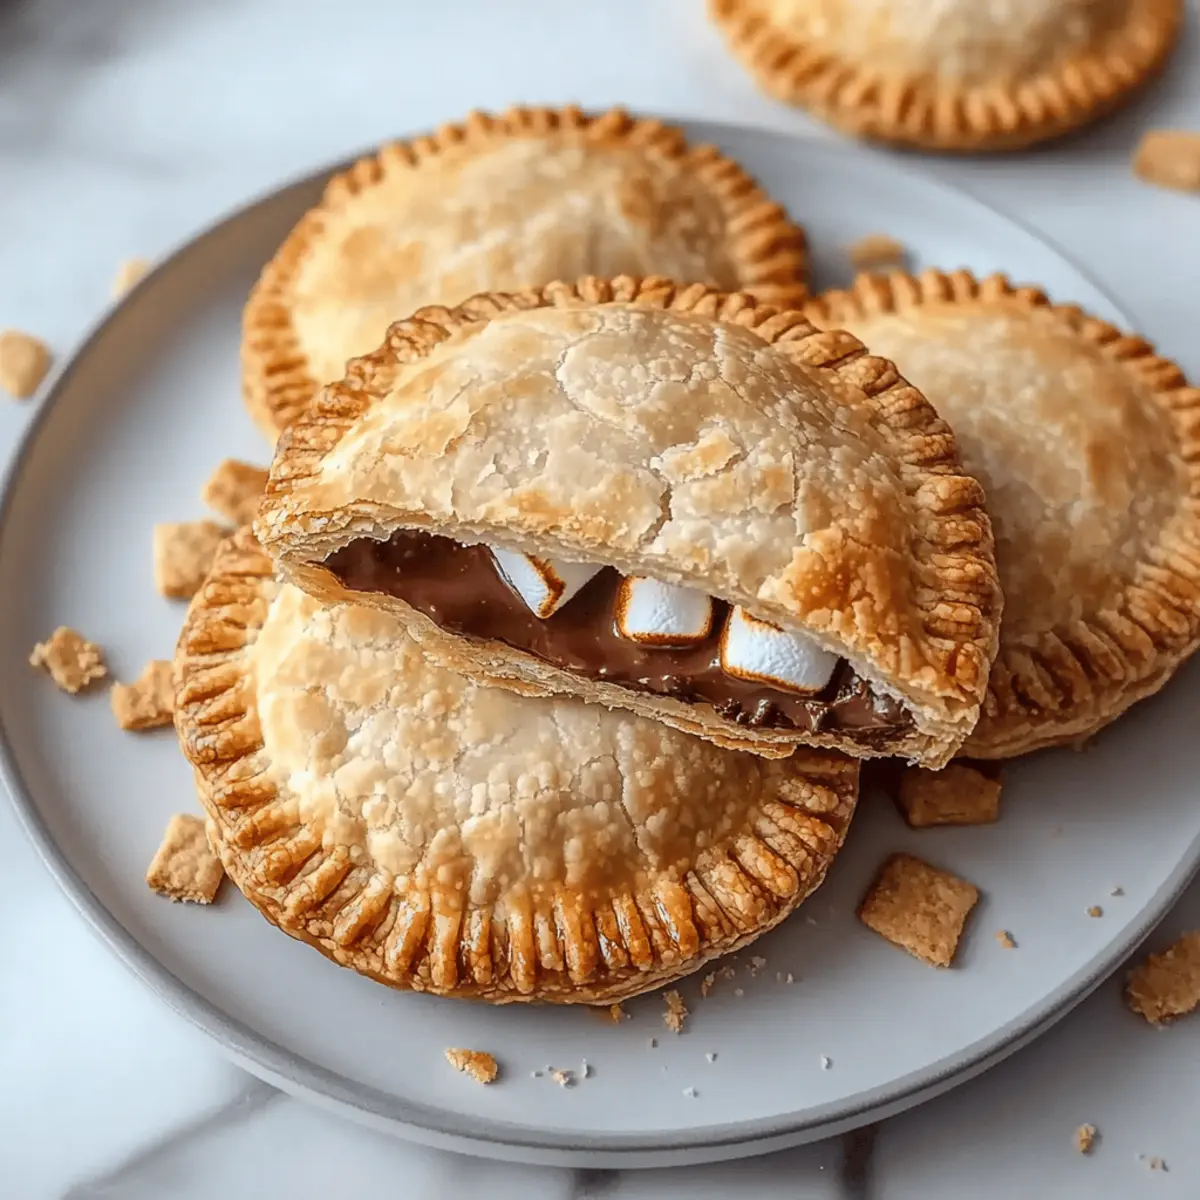
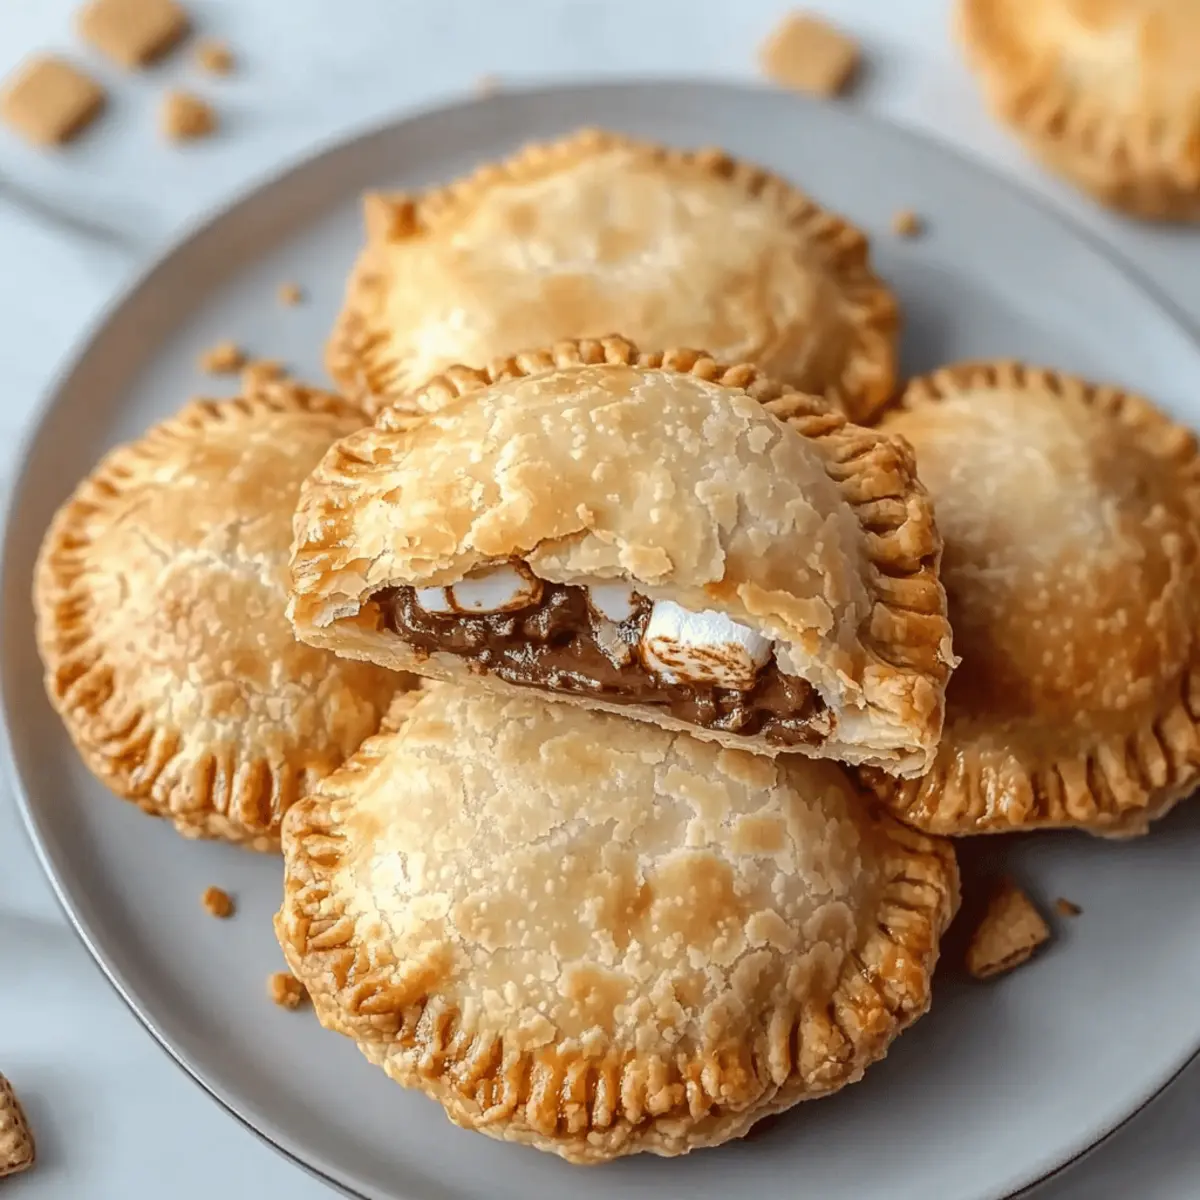
As I rummaged through my kitchen, visions of summer camping trips danced in my mind. Nothing captures that nostalgia quite like the bliss of s’mores, gooey marshmallow goo and melty chocolate nestled between crunchy graham crackers. With my recipe for S’mores Hand Pies, I’ve transformed this classic outdoor treat into an easy dessert everyone will adore. These delightful hand pies are the perfect portable snack for picnics or cozy evenings at home, offering a fun twist on a beloved favorite. Plus, whether you opt for a store-bought crust for a quick treat or decide to roll out your own for ultimate flakiness, the choice is yours! Are you ready to take a bite out of nostalgia? Let’s make some magic in the kitchen!

Why are S’mores Hand Pies so irresistible?
Indulgent flavors come together in these hand pies, melded like classic s’mores but with a twist! Portable and easy to share, they’re perfect for picnics or cozy nights in. Quick to prepare, you can whip them up in just under 30 minutes, making them ideal for last-minute treats. Customize the fillings with different chocolates or graham cracker varieties to make each batch unique. Family-friendly and a guaranteed crowd-pleaser, these hand pies will have everyone asking for seconds! Don’t forget to check out how to store them for later, so you can savor this delightful dessert whenever the cravings hit.
S’mores Hand Pies Ingredients
For the Pie Crust
• Refrigerated Pie Crust – A convenient option that saves time; homemade crust offers a flakier texture.
For the Filling
• Chopped Chocolate Bars – Use semi-sweet or dark for a rich, melted result; chocolate chips can also work for varied meltiness.
• Miniature Marshmallows – Adds gooey sweetness for that classic s’mores flavor; consider using homemade for a gourmet touch.
• Crushed Graham Crackers – Provides a delightful crunch; swap with gluten-free options for dietary needs.
For Topping (Optional)
• Cinnamon Sugar – For a sweet dusting that adds an extra layer of flavor and appeal; perfect for those who love a little sweetness on top.
With these ingredients in hand, you’re all set to create a magical treat that’ll bring back those fond memories of campfire gatherings!
Step‑by‑Step Instructions for S’mores Hand Pies
Step 1: Prepare the Pie Crust
Remove the refrigerated pie crusts from their packaging and let them sit at room temperature for 10-15 minutes. This resting period makes the dough easier to roll and handle. If you prefer a homemade crust, roll it out on a lightly floured surface until it’s about 1/8-inch thick. Either way, aim for a flaky and tender base for your S’mores Hand Pies.
Step 2: Cut the Dough
Using a 3-inch cookie cutter, cut out circles from the dough, creating as many as you can. Gather any scraps and re-roll them to cut out more circles as needed. Lay the cutouts on a baking sheet lined with parchment paper to keep them from sticking. This will make assembling the S’mores Hand Pies easier, ensuring all your circles are ready to go.
Step 3: Make the Filling
In a mixing bowl, combine the chopped chocolate, miniature marshmallows, and half of the crushed graham crackers. Stir until everything is evenly mixed, helping to create a gooey and delicious filling. This mixture is what will bring the delightful S’mores flavor to your hand pies, reminiscent of cozy campfire nights!
Step 4: Assemble the Hand Pies
Place about 1 tablespoon of the chocolate and marshmallow filling onto the center of half of the dough circles. Be careful not to overstuff, as about a tablespoon is perfect to prevent any bursting during baking. Make sure to leave the edges clear for sealing, allowing your S’mores Hand Pies to bake beautifully without leaking.
Step 5: Seal the Pies
Moisten the edges of the filled circles with a bit of water to help them stick. Top each filled circle with another circle of dough, pressing down gently to seal. It’s essential to have a secure closure to keep the goods inside delicious and gooey.
Step 6: Crimp the Edges
Use a fork to crimp the edges of each hand pie, creating a decorative seal that adds a touch of charm. This step also ensures your S’mores Hand Pies stay sealed during baking, locking in all that melty goodness.
Step 7: Brush and Dust
Brush the tops of the pies with melted butter for a golden, shiny finish. Then, sprinkle the remaining crushed graham crackers over the surface for an added crunch and flavor layer. This small touch transforms your S’mores Hand Pies into a mouthwatering treat that looks as good as it tastes.
Step 8: Preheat the Air Fryer
Preheat your air fryer to 350°F, and while it warms up, prepare the basket by lightly spraying it with cooking spray. This step prevents the hand pies from sticking and ensures they cook evenly, resulting in perfectly golden and flaky crusts.
Step 9: Cook the Hand Pies
Carefully place the hand pies into the preheated air fryer basket, ensuring they’re not overcrowded. Air fry for about 10 minutes, keeping a close eye as they bake to prevent them from becoming overcooked. You’re looking for a lovely golden-brown color and for the filling inside to be all melty and gooey.
Step 10: Cool and Serve
Once they’re done, carefully remove the S’mores Hand Pies from the air fryer and transfer them to a wire rack. Let them cool slightly before serving, as the filling will be hot. These little delights are best enjoyed warm, bringing that nostalgic campfire flavor to your kitchen!

Make Ahead Options
These S’mores Hand Pies are perfect for busy home cooks looking to save time during the week! You can prepare the pie crust and filling up to 24 hours in advance; simply refrigerate the dough wrapped in plastic and the filling in an airtight container. For optimal quality, assemble the hand pies just before baking to keep the crust flaky and the filling gooey. When you’re ready to serve, place them in a preheated air fryer and cook until golden brown. If you’re really pressed for time, you can freeze unbaked S’mores Hand Pies for up to 3 months—just pop them directly from the freezer into the air fryer, adding a minute or two to the cooking time. Enjoy a delightful, homemade treat with minimal effort!
Expert Tips for S’mores Hand Pies
-
Think Small: Avoid overstuffing your hand pies; keep filling to about 1 tablespoon. This prevents them from bursting while baking.
-
Seal It Right: Ensure proper edge sealing by moistening with water and pressing tightly. This step keeps gooey filling inside where it belongs.
-
Poke Holes: Use a toothpick to poke small holes in the tops of the hand pies. This allows steam to escape and prevents sogginess.
-
Watch the Clock: Cooking time matters! Keep a close eye on your S’mores Hand Pies as they bake to avoid burning the marshmallows, which can happen quickly.
-
Customize for Fun: Feel free to mix and match fillings! Swap in flavored marshmallows or different types of chocolate to create unique S’mores Hand Pies every time.
S’mores Hand Pies Variations & Substitutions
Feel free to unleash your creativity and personalize these tasty hand pies for your unique palate!
-
Gluten-Free Crust: Switch to gluten-free pie crust for a delightful alternative if you have dietary needs. This ensures everyone can enjoy the magic of s’mores.
-
Chocolate Swap: Dark Chocolate: Use dark chocolate bars for a richer, deeper flavor that pairs beautifully with the marshmallows. The intense chocolate taste beautifully complements the sweet toppings.
-
Flavorful Marshmallows: Flavored Marshmallows: Try strawberry or chocolate marshmallows for a fun twist that adds fruity or enhanced chocolate flavors. Each bite becomes an exciting new experience!
-
Extra Crunch: Nuts: Incorporate chopped nuts like pecans or almonds into the filling for added crunch. This delicious texture contrast elevates the sensory enjoyment of your hand pies!
-
Spiced Sweetness: Add Nutmeg or Pumpkin Spice: Mix a pinch of nutmeg or pumpkin spice into the cinnamon sugar for the topping. This adds a warm autumnal flavor that feels cozy and inviting.
-
Fruity Fusion: Peppermint or Cherry Extract: Add a drop of peppermint or cherry extract to your filling for a surprising taste burst. It brings a festive touch that surprises and delights!
-
Firey Kick: Cayenne Pepper: For those who like a little heat, dust a pinch of cayenne pepper over the chocolate filling. It creates a sweet-spicy balance that adds unexpected depth.
-
Chocolate Dipping: Pair your hand pies with Chocolate Syrup for drizzling or dipping. It brings an indulgent touch to your already tempting treats, making every bite even more delightful!
Remember, the options are endless and your hand pies can be as unique as you are! Enjoy playing around with these variations, and don’t forget to check out great ideas for what to serve with your hand pies to make your treat time truly special.
What to Serve with Irresistible S’mores Hand Pies
Pair your delightful hand pies with these scrumptious additions for a sumptuous meal that dances with flavors and textures.
- Cold Milk: A classic companion, milk balances the sweetness of the pies and quenches your thirst perfectly.
- Hot Chocolate: Indulge in a cozy cup of hot chocolate for a match made in dessert heaven, enhancing the chocolate flavor.
- Iced Coffee: The rich, bold notes of iced coffee create a delightful contrast, making each hand pie bite even more enjoyable.
- Fresh Fruit Salad: Bright, tangy fruits add a refreshing element to your dessert experience, cutting the richness of the hand pies.
- Chocolate Syrup: Drizzle this over your hand pies for an extra touch of decadence—it’s a sweet indulgence that won’t go unnoticed.
- Marshmallow Cream Dip: Offer this alongside for an interactive treat; it’s perfect for dipping and amplifies that s’mores magic!
- Ice Cream Sundae: Team your hand pies with a scoop of vanilla ice cream for a luscious contrast of hot and cold, making a fabulous sundae.
- Graham Cracker Crust Cheesecake: Keep the s’mores theme alive by serving a slice of cheesecake topped with graham cracker crumbs and chocolate drizzle.
- Mixed Berry Compote: This warm, sweet-tart sauce over your hand pies introduces a beautiful burst of flavor that elevates the entire dish.
- Whipped Cream: A light dollop adds fluffy richness and makes each bite a fluffy cloud of joy that complements the hand pies’ texture beautifully.
How to Store and Freeze S’mores Hand Pies
Room Temperature: Store leftover S’mores Hand Pies in an airtight container for up to 2 days, ensuring they remain soft and delightful.
Fridge: If you prefer to keep them longer, refrigerate for up to 4 days in an airtight container. Reheat in the microwave for a few seconds before serving.
Freezer: For longer storage, freeze unbaked or baked hand pies. Wrap them individually in plastic wrap and place them in a freezer bag for up to 3 months.
Reheating: To enjoy frozen S’mores Hand Pies, bake straight from the freezer in a preheated air fryer at 350°F for 10-12 minutes, or until heated through and crispy.

S’mores Hand Pies Recipe FAQs
What kind of chocolate should I use for my S’mores Hand Pies?
I recommend using semi-sweet or dark chocolate bars for a rich and melty filling. However, if you want a bit of variety, chocolate chips are a great alternative! They melt well and can give your hand pies a different texture.
How do I store leftover S’mores Hand Pies?
To keep your hand pies fresh, store any leftovers in an airtight container at room temperature for up to 2 days. If you’d like to keep them for a longer time, you can refrigerate them, where they’ll last for up to 4 days. Just reheat in the microwave for a few seconds before enjoying!
Can I freeze S’mores Hand Pies?
Absolutely! For longer storage, you can freeze either unbaked or baked hand pies. To freeze unbaked pies, wrap each in plastic wrap and place them in a freezer bag. This method keeps them fresh for up to 3 months. When you’re ready to bake them, just pop them in a preheated air fryer at 350°F for 10-12 minutes, and they’ll be deliciously crispy.
What should I do if my hand pies burst while baking?
If your S’mores Hand Pies burst, don’t fret! It typically happens due to overstuffing the filling. In the future, make sure to limit it to about 1 tablespoon for each pie. Also, sealing the edges well with water and crimping with a fork are great tricks to keep everything inside. Poking small holes in the tops also allows steam to escape, reducing the risk of bursting.
Can I make these hand pies gluten-free?
Yes! If you’re looking for a gluten-free option, simply swap out the traditional graham crackers for gluten-free ones. Also, ensure that your pie crust is certified gluten-free. This way, everyone can enjoy these sweet treats without worry!
Is this recipe suitable for kids?
Absolutely! These S’mores Hand Pies are a fantastic option for kids, not just because they’re delicious but also because they’re fun to make. Involve them in the assembling process, and let them choose their favorite chocolate or toppings. Just be mindful of the hot filling when serving!

Warm and Gooey S’mores Hand Pies for Sweet Cravings
Ingredients
Equipment
Method
- Prepare the Pie Crust by removing refrigerated pie crusts from packaging and letting them sit at room temperature for 10-15 minutes.
- Cut the Dough using a 3-inch cookie cutter to create circles from the dough.
- Make the Filling by combining chopped chocolate, miniature marshmallows, and half of the crushed graham crackers.
- Assemble the Hand Pies by placing about 1 tablespoon of filling onto the center of half the dough circles.
- Seal the Pies by moistening the edges of the filled circles with water and pressing down gently to seal.
- Crimp the Edges using a fork to create a decorative seal.
- Brush and Dust the tops of the pies with melted butter and sprinkle remaining crushed graham crackers.
- Preheat the Air Fryer to 350°F, ensuring to lightly spray the basket with cooking spray.
- Cook the Hand Pies in the preheated air fryer for about 10 minutes.
- Cool and Serve by transferring hand pies to a wire rack and letting them cool before serving.

Leave a Reply